Nov 21, 2025
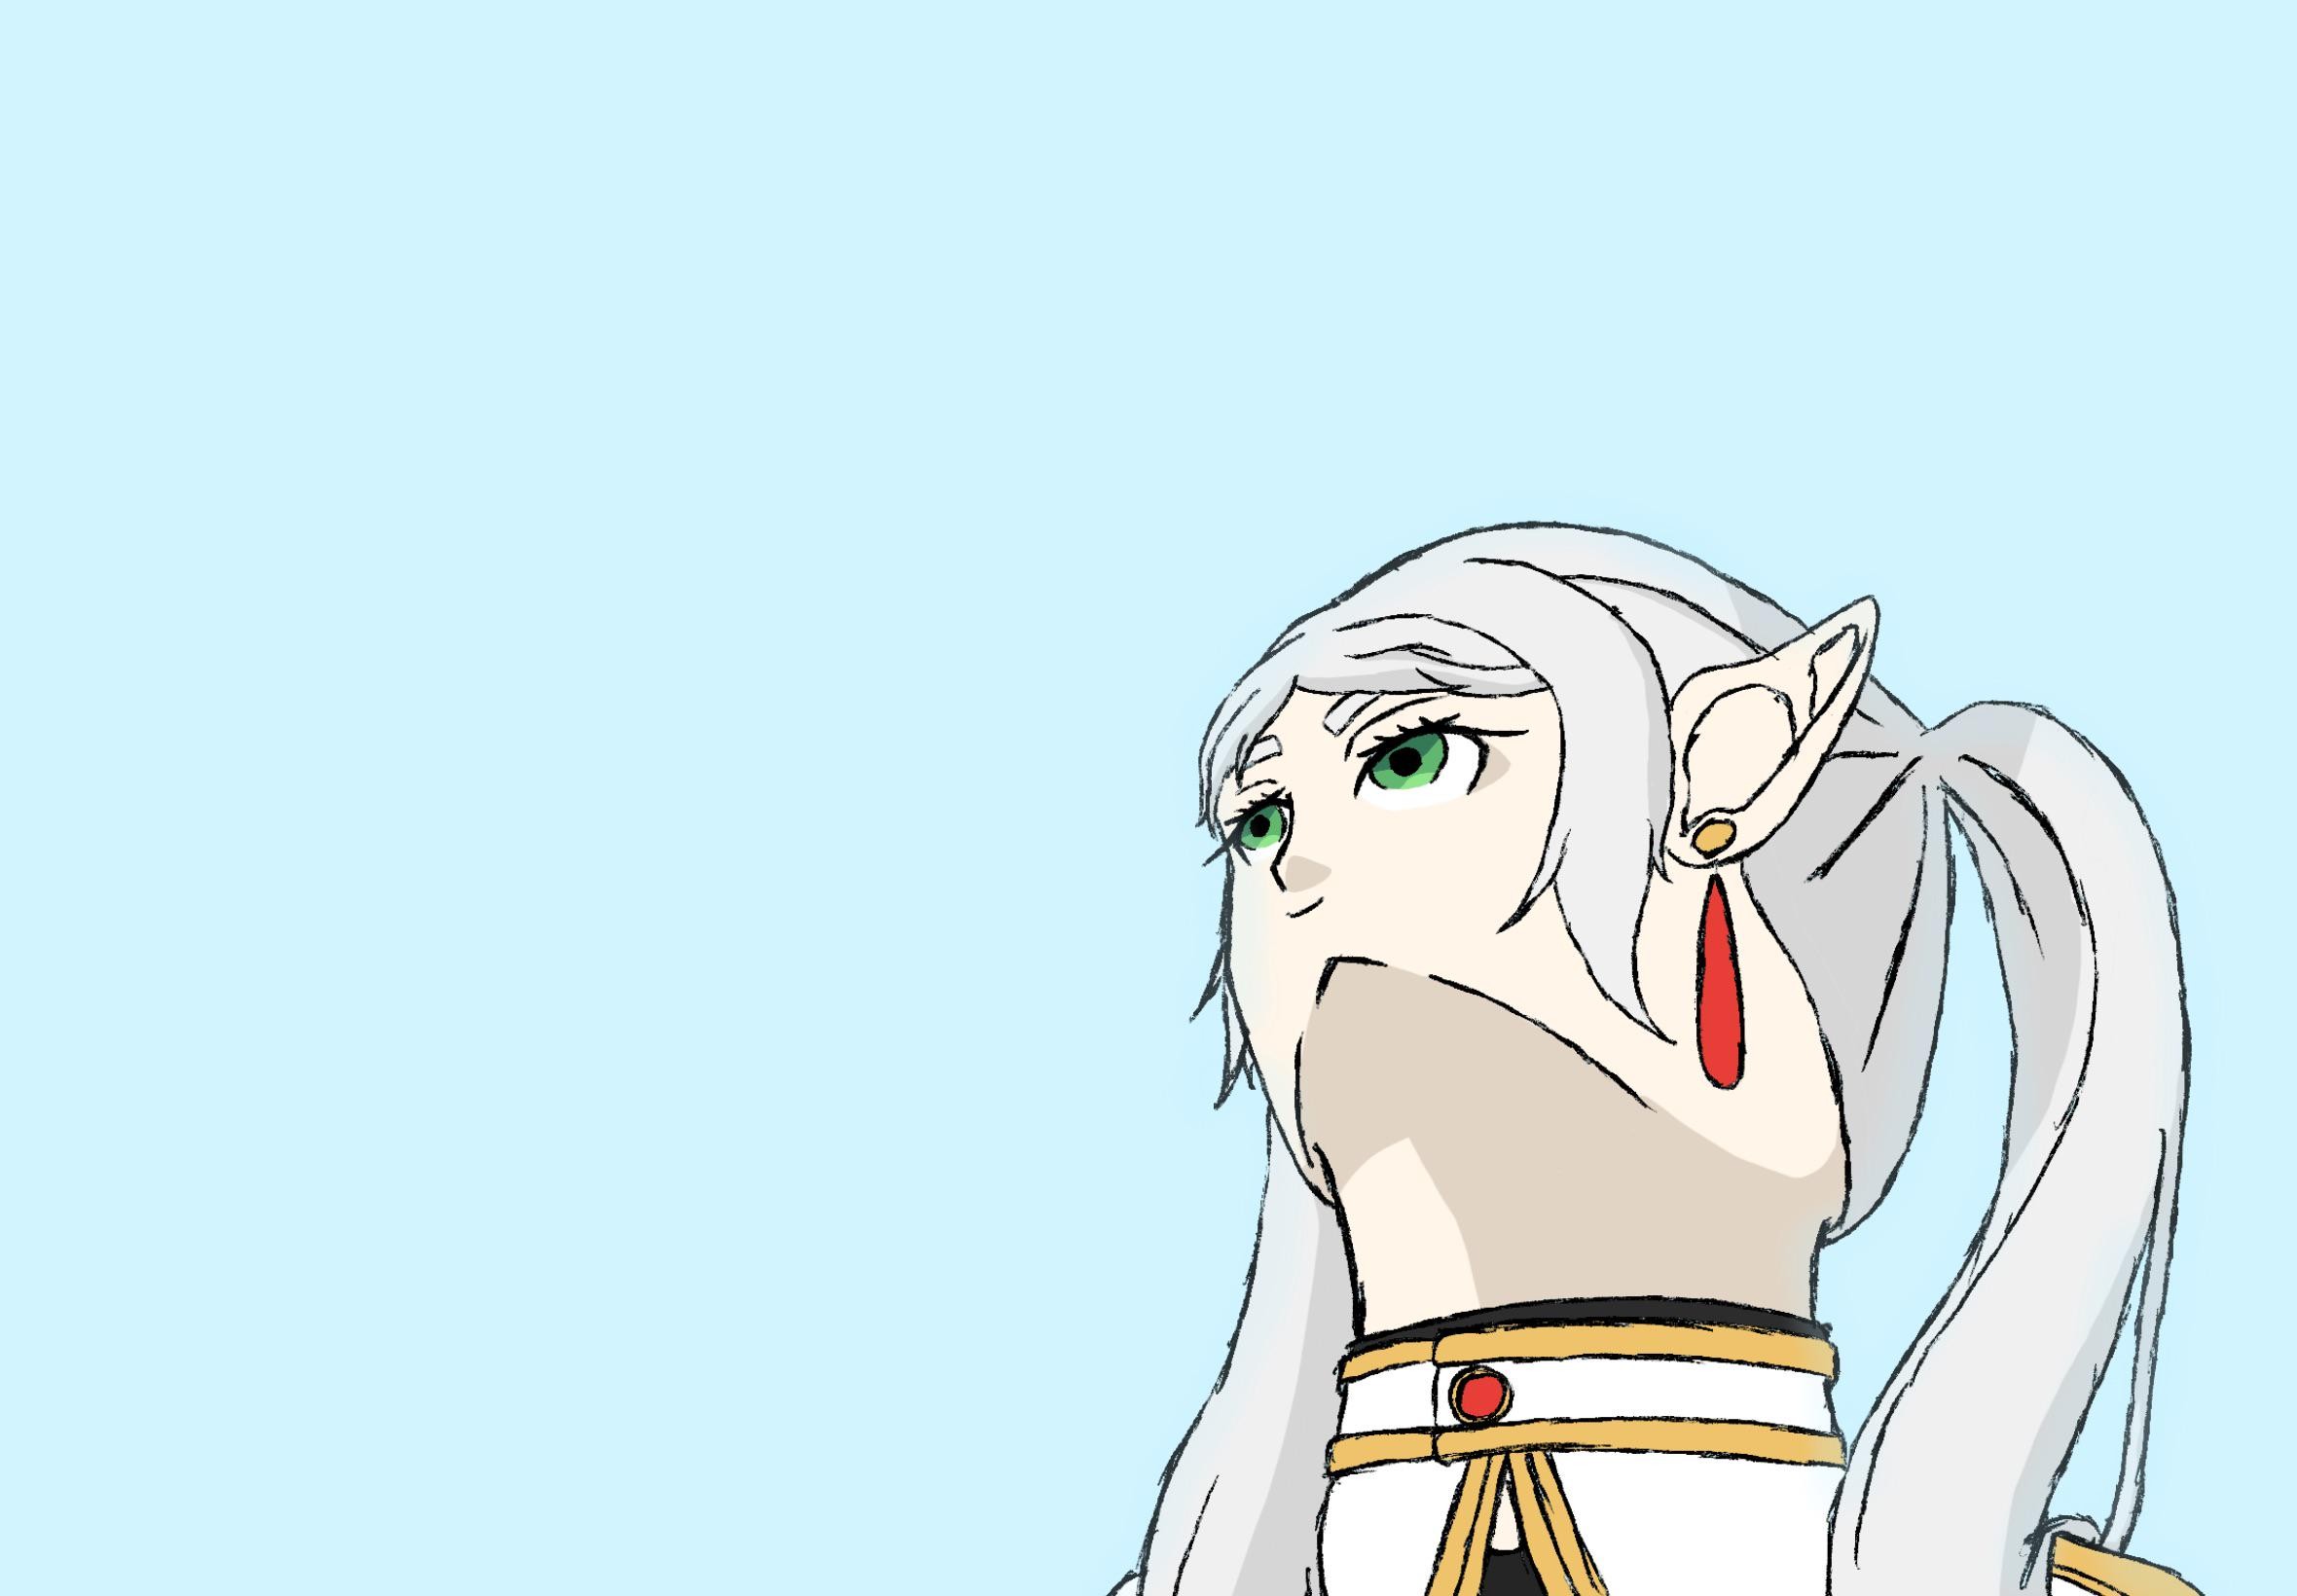
Frieren from a Low Angle
How I drew the legendary Frieren from a low angle 📐

Hey guys!
Have you seen the crazy art trend going around of trying to draw Frieren from a low angle? This whole trend started from a Reddit post where artist SpaceDev1 posted a drawing of how difficult it was to draw Frieren from a low angle. What started as a super relatable post turned into a full-blown art challenge overnight, with artists from all over the world posting their own takes on drawing Frieren.
Drawing faces at this odd angle is definitely a challenge but I'm a huge Frieren fan myself so I couldn't pass on this opportunity to draw her! Today I wanted to share my process and some tips for drawing tricky angles of the face!
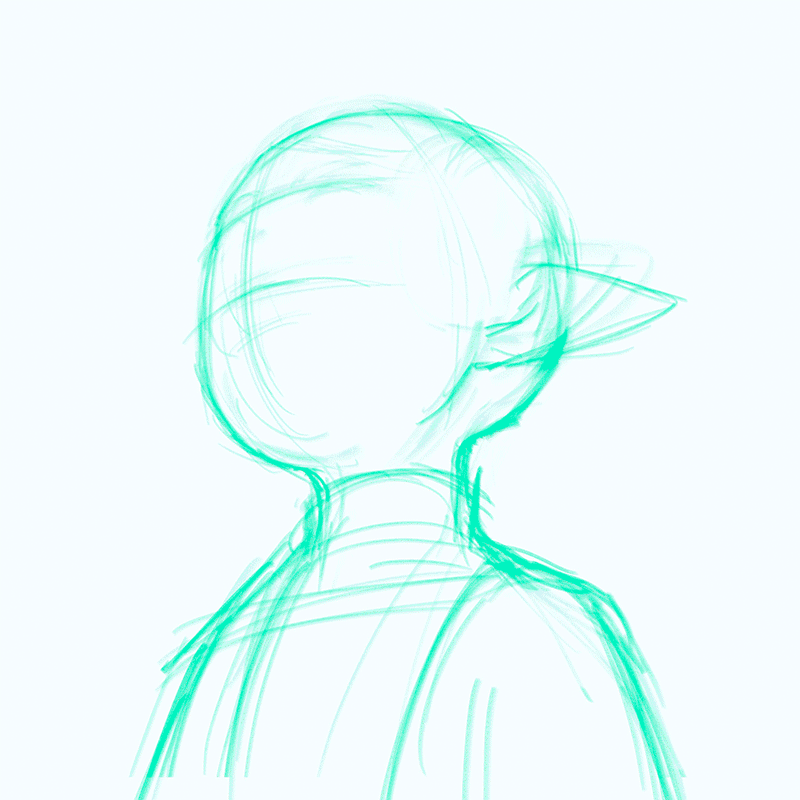
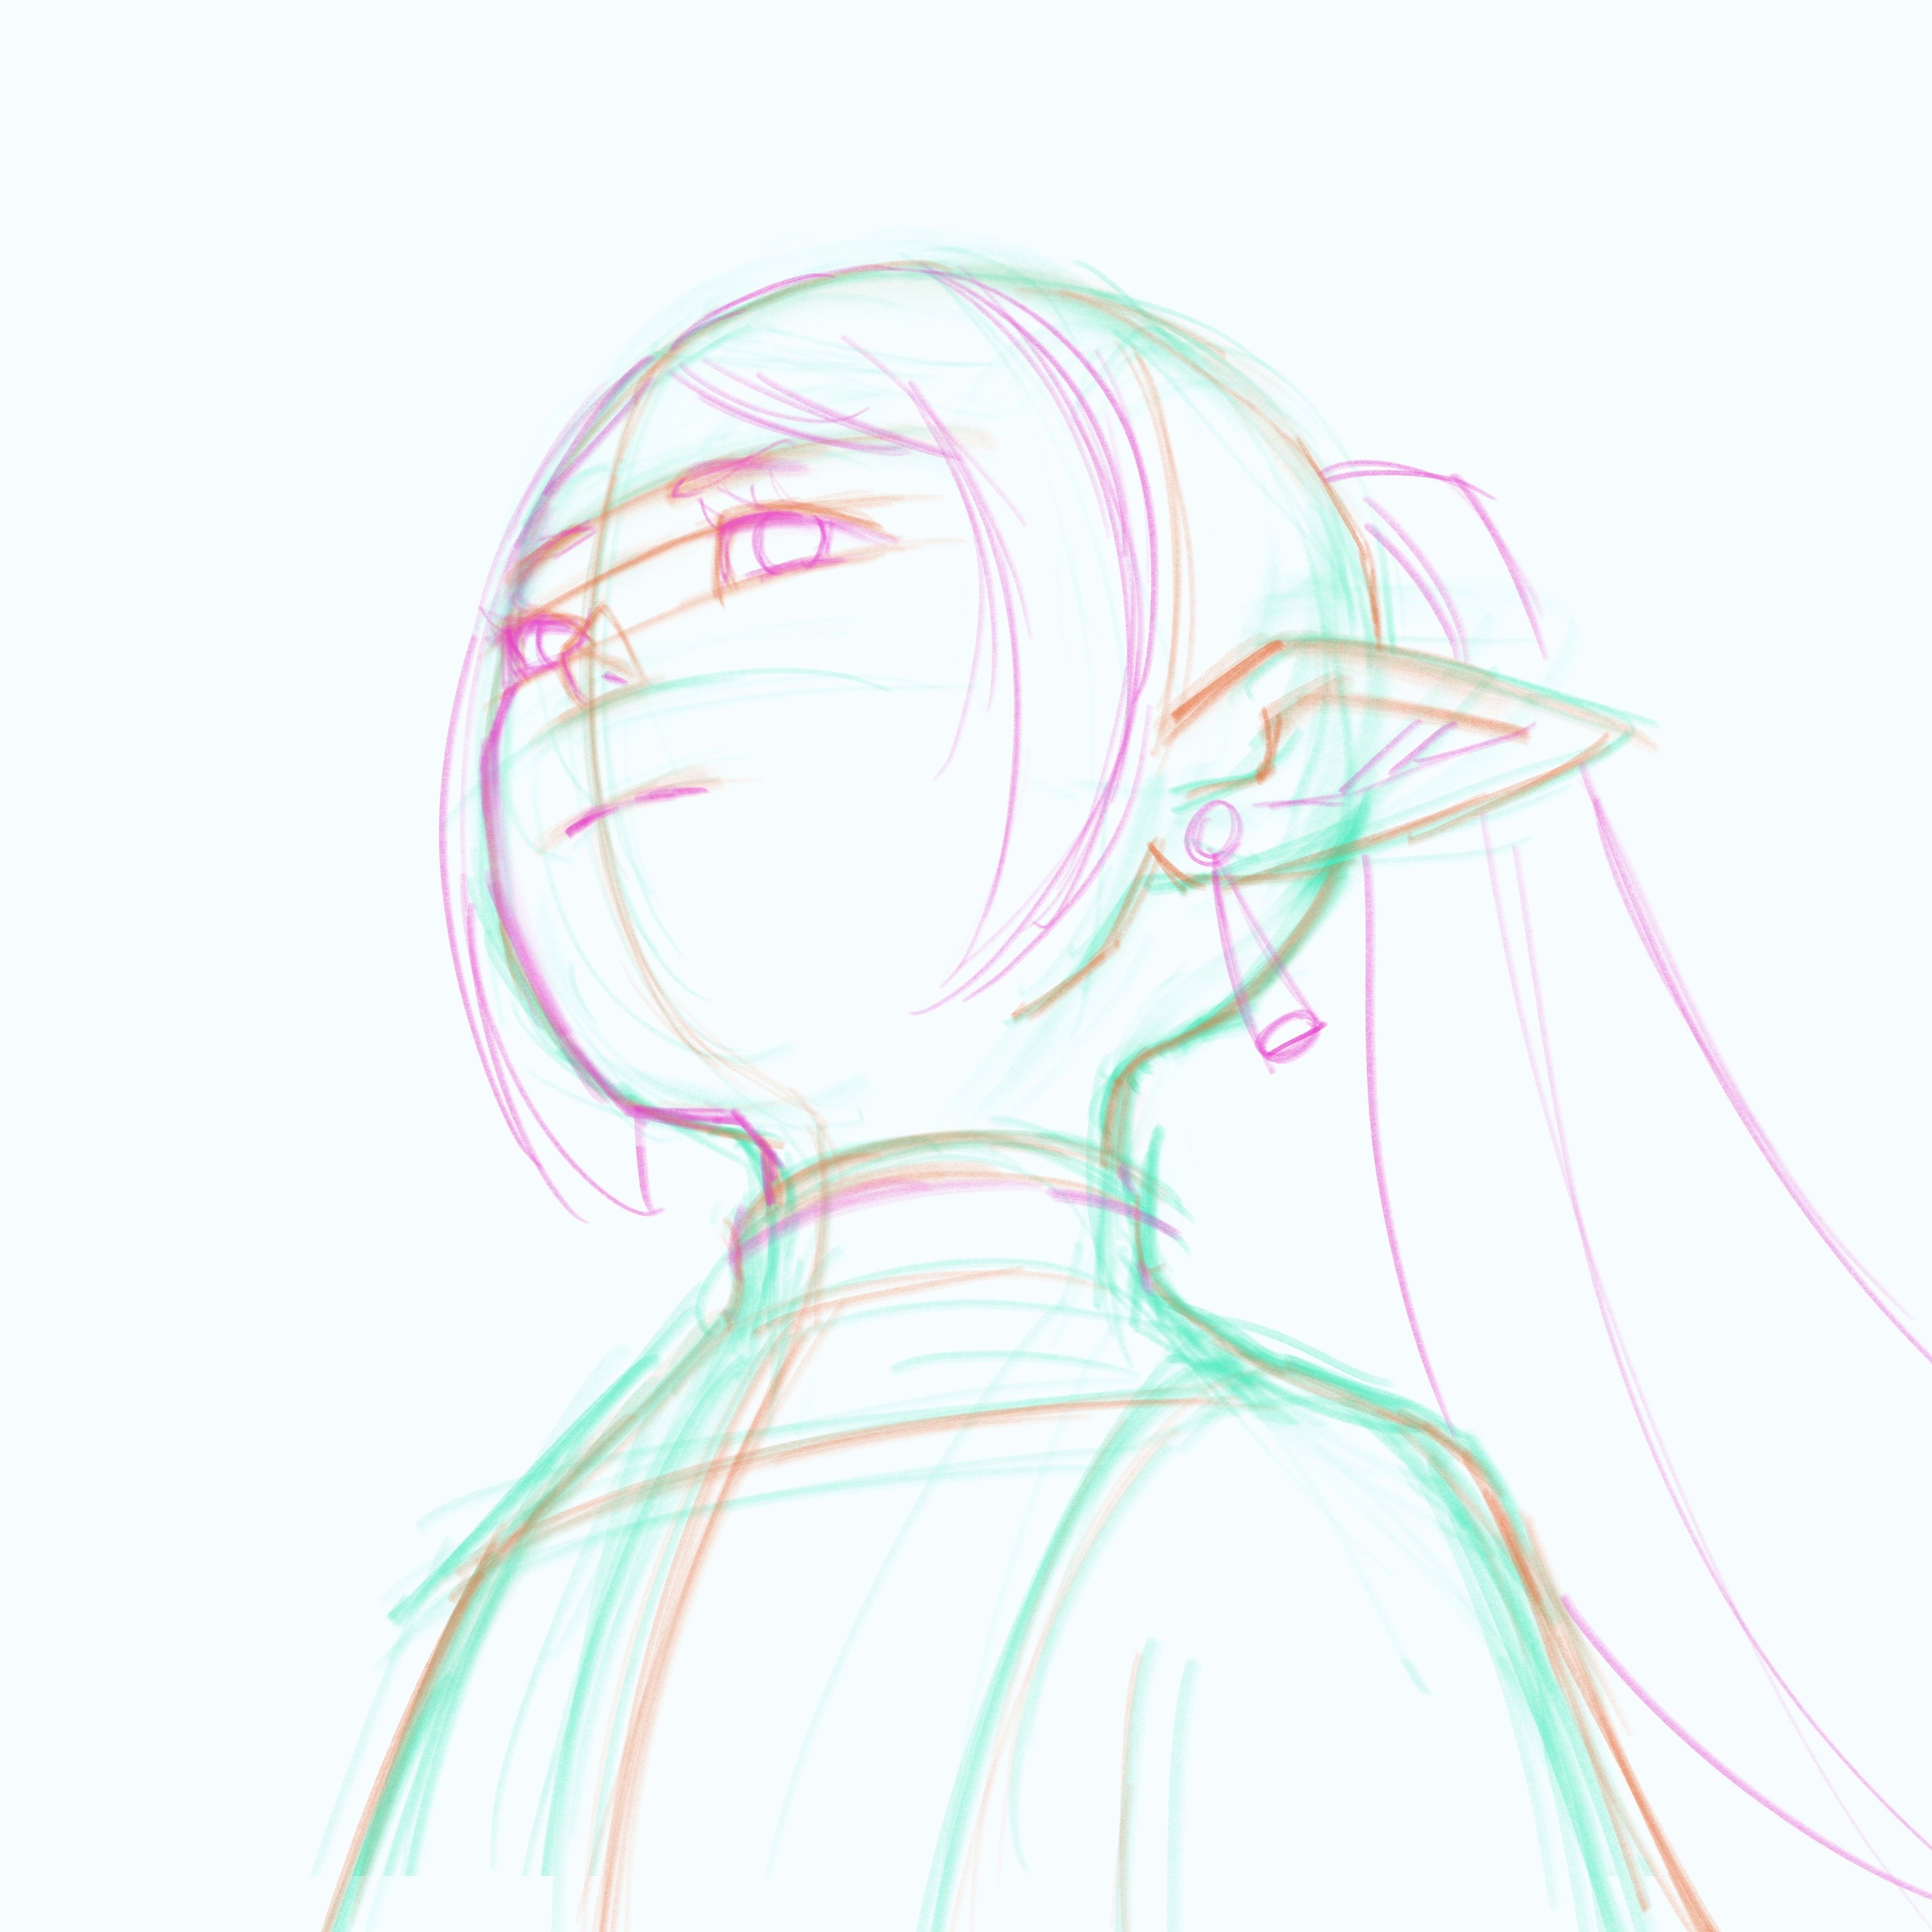
Initial Block-in Sketch
I always start my drawings with a really rough block-in sketch of the gesture, general shapes, and silhouette of the character. I just want to get all the big basic shapes down and I'll try not to draw any details in this early stage. Because this is a challenging angle, I try to think in 3D space and draw with basic forms like spheres, cylinders, and cubes to help me build this character and understand this angle first.
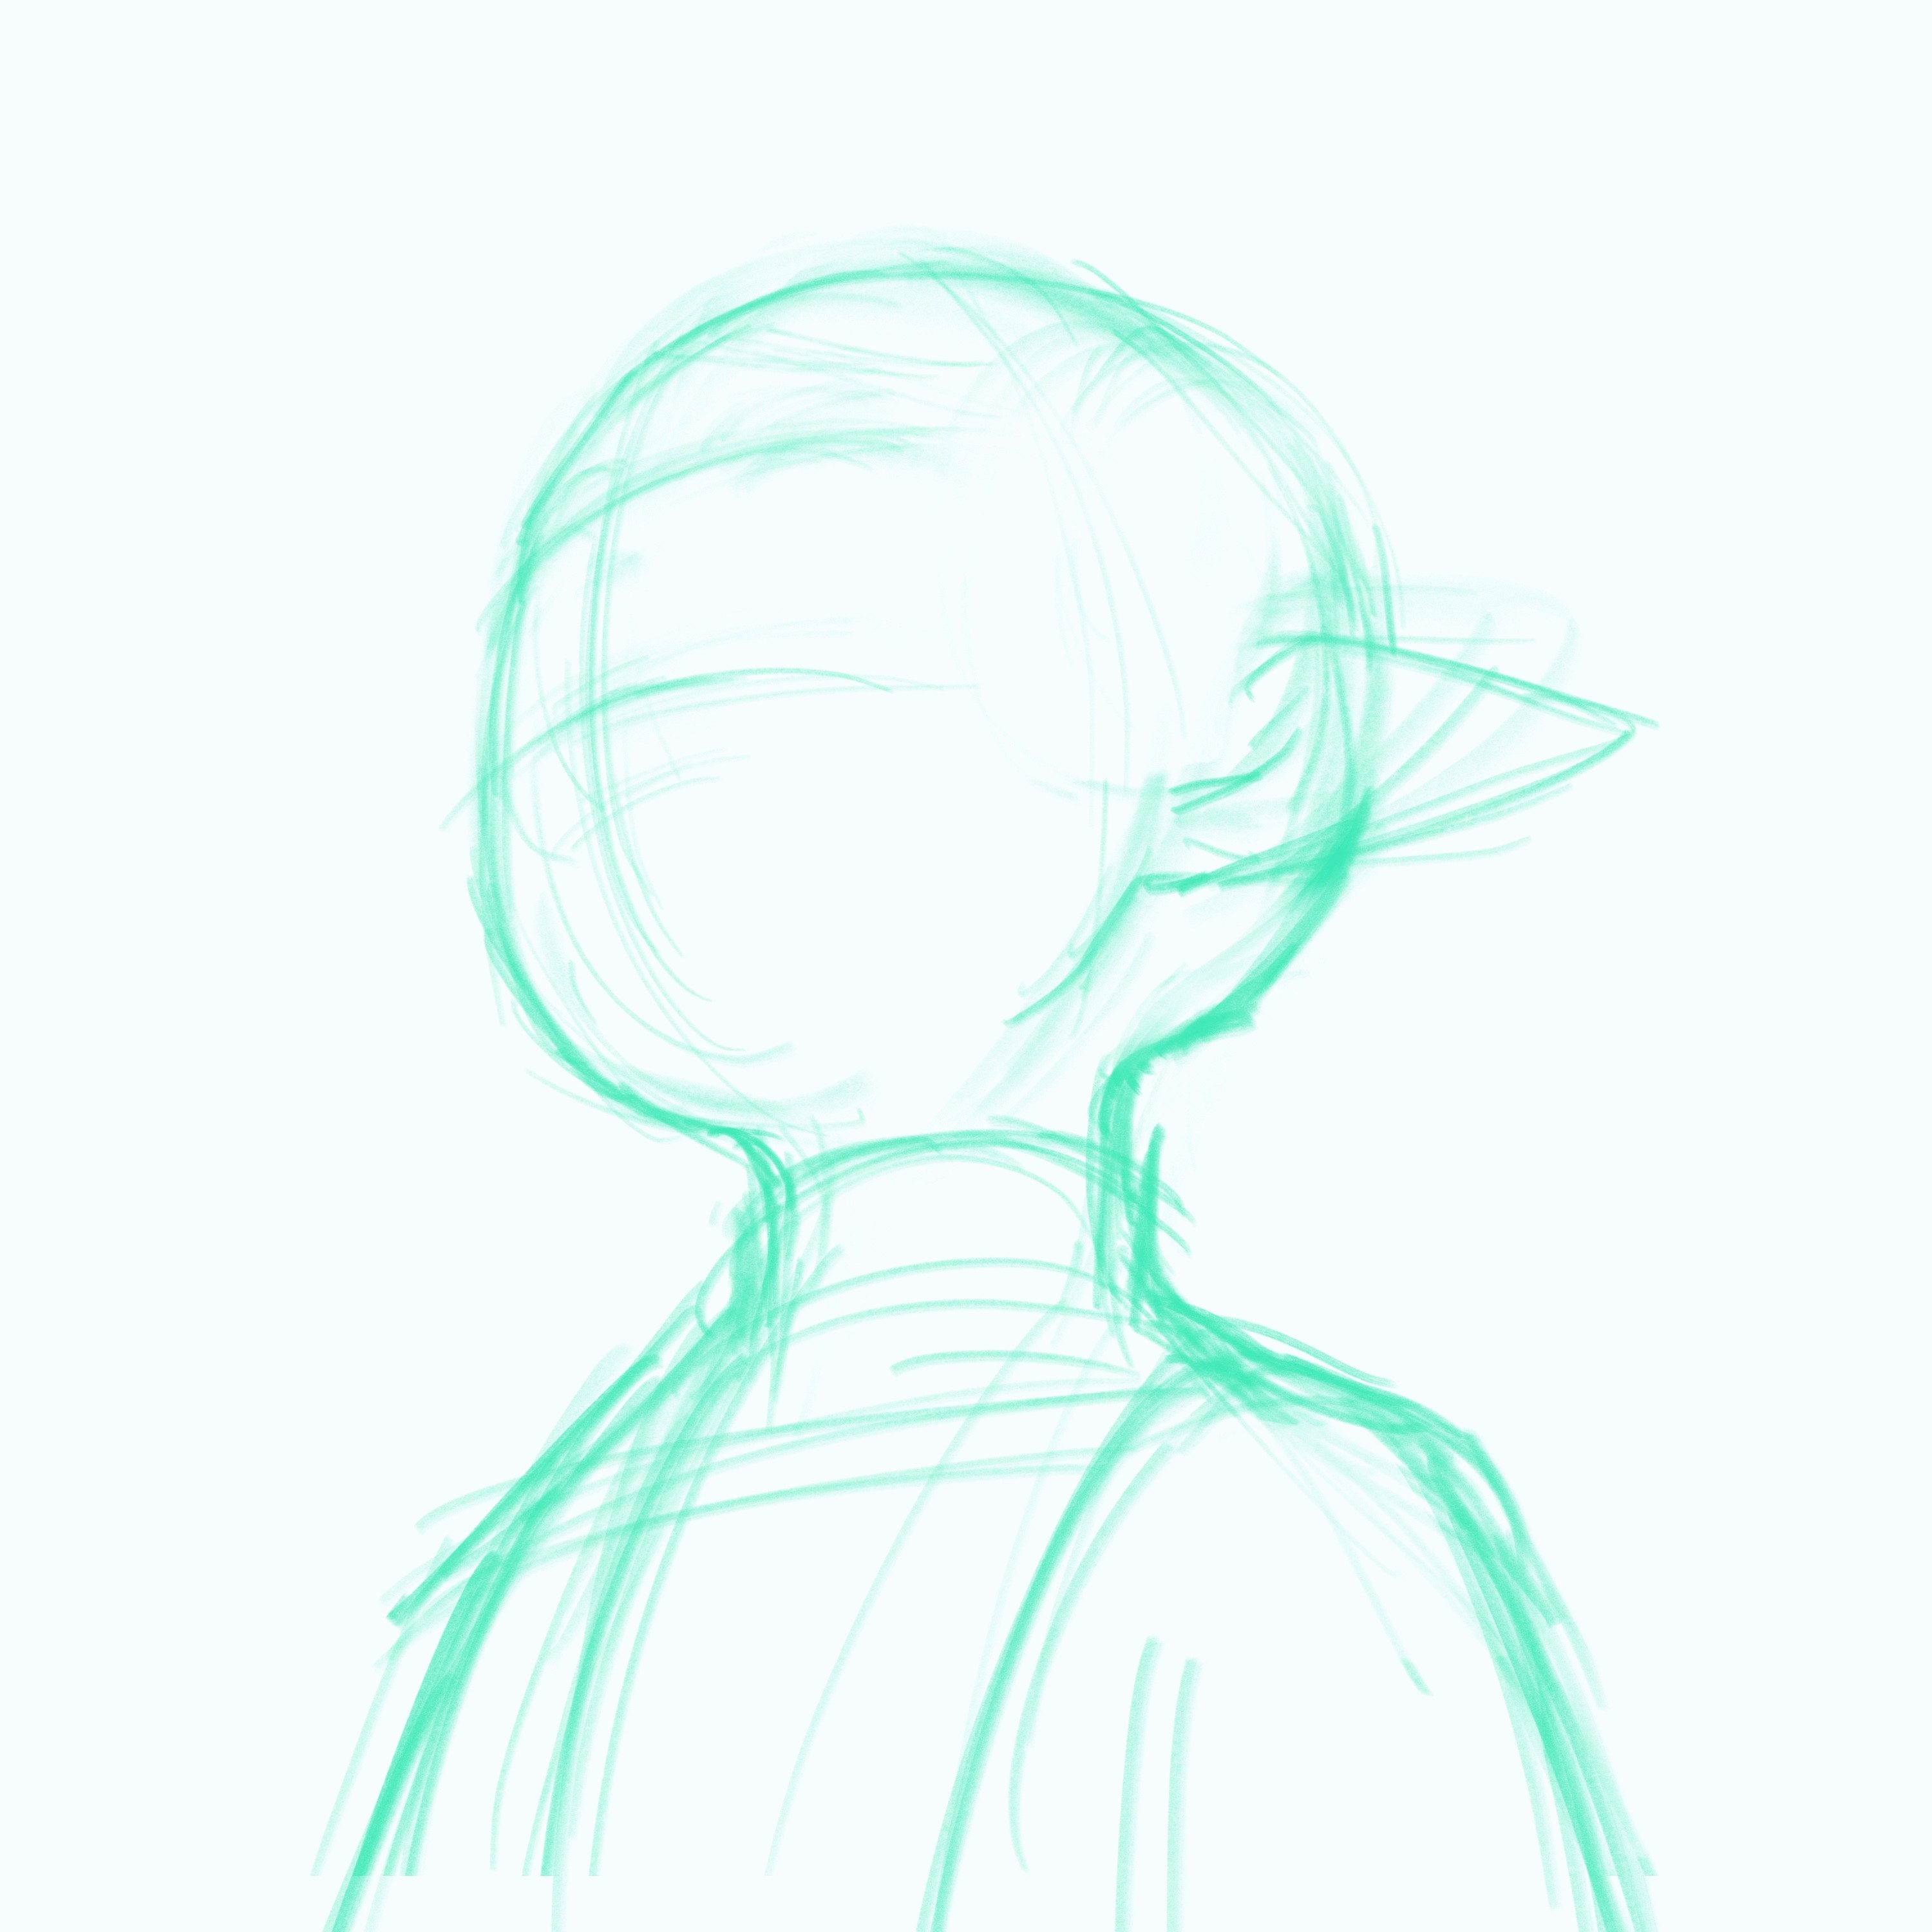
Blocking in the Facial Features
Next, I'll start blocking in some of the basic shapes of the features and other characteristics of Frieren like her pointy ears. I try to restrain myself from getting into too much detail in this early stage. I'm still just trying to figure out the perspective and basic placement of all the important parts of the face. I'm using my understanding of anatomy and how each feature is broken down into basic shapes to construct the face before getting into any details. The best way to communicate the foreshortened perspective and angles of the face is by using the distance between the features. Because our viewpoint is from an extreme low angle, the brow, eyes, nose, and lips will be very close together and be smushed closer to the top of the head. I'm always surprised at how much space you need to leave for the chin and underside of the chin. Another great landmark to communicate the angle of the face is the placement of the ear. Because we are looking up at Frieren, the ear placement will be very low. The ear is an incredible landmark on the head that will instantly communicate perspective if placed accurately!
I think a small trap that a lot of artists fall into when drawing the face at an odd angle is trying to smush the head into a box too literally. Especially with weird angles, it's important to think about the face as more of a sphere or cylinder because there is a distinct curvature to the features. If you slap the features flat onto the front of the face like a box, you'll lose the natural curvature of the face. A box is a great tool to help understand the initial general perspective, but as you keep refining, a more organic shape is helpful to capture the subtleties of facial features.
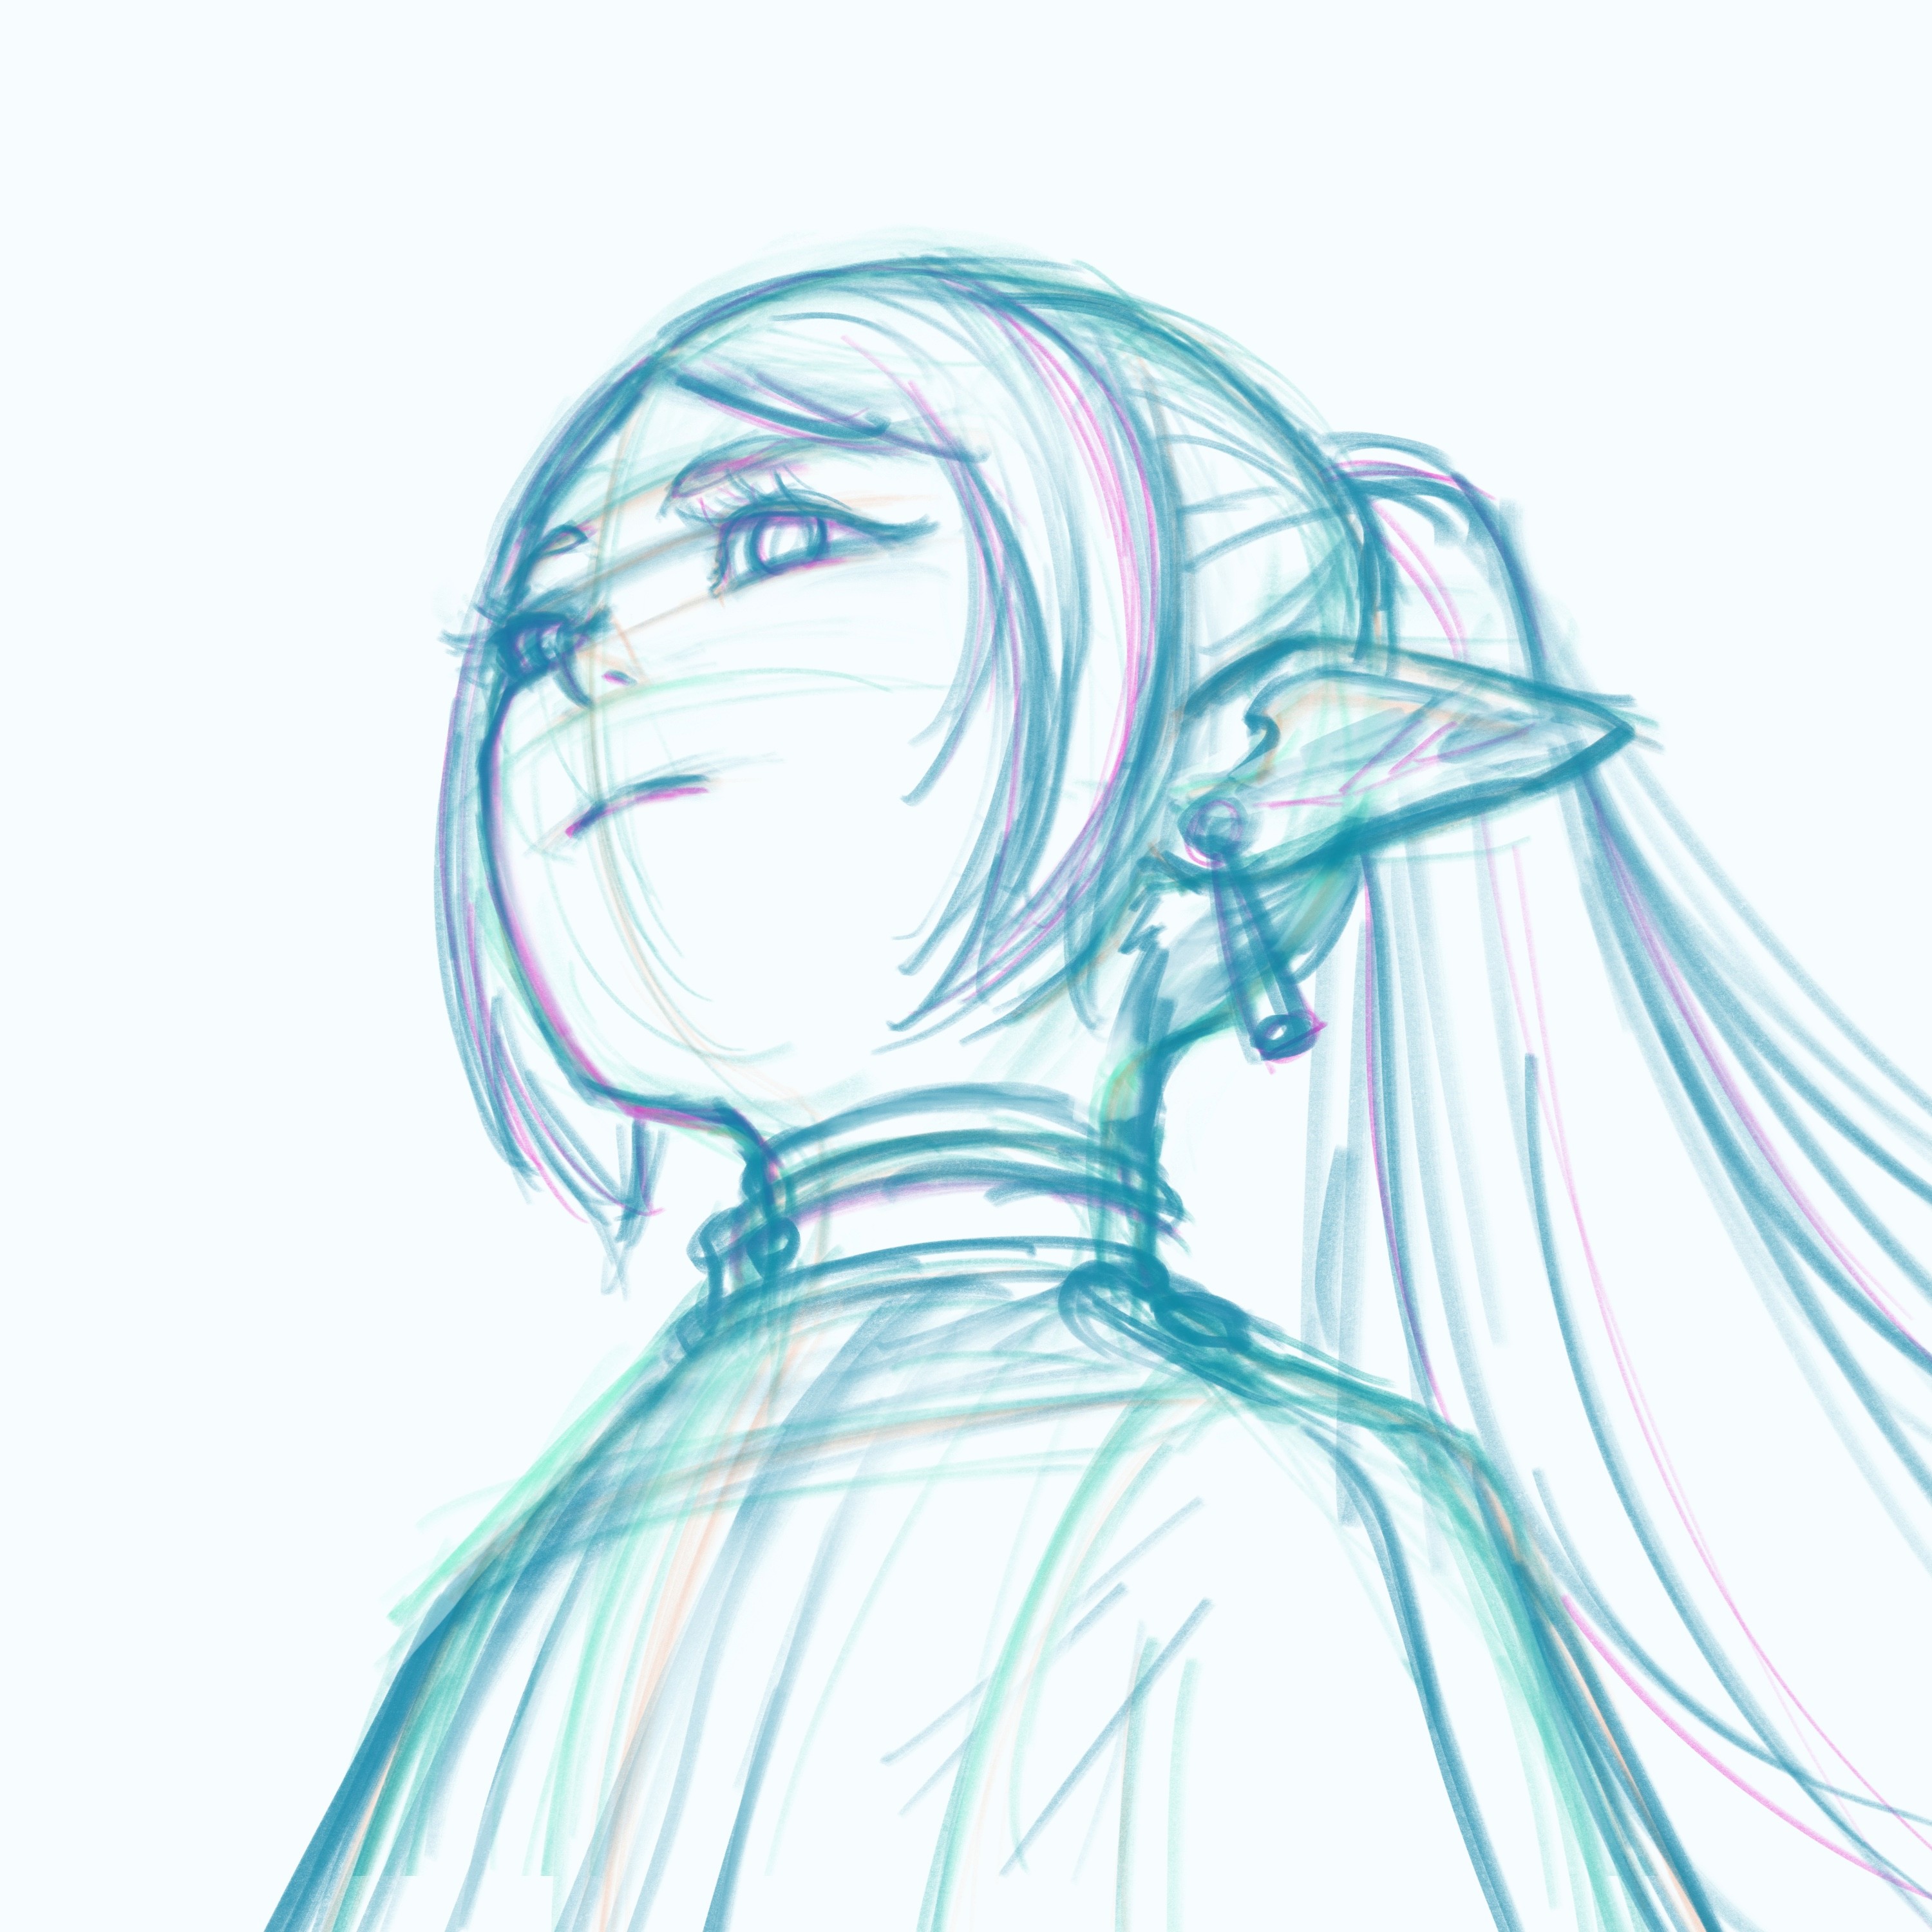
Less is More
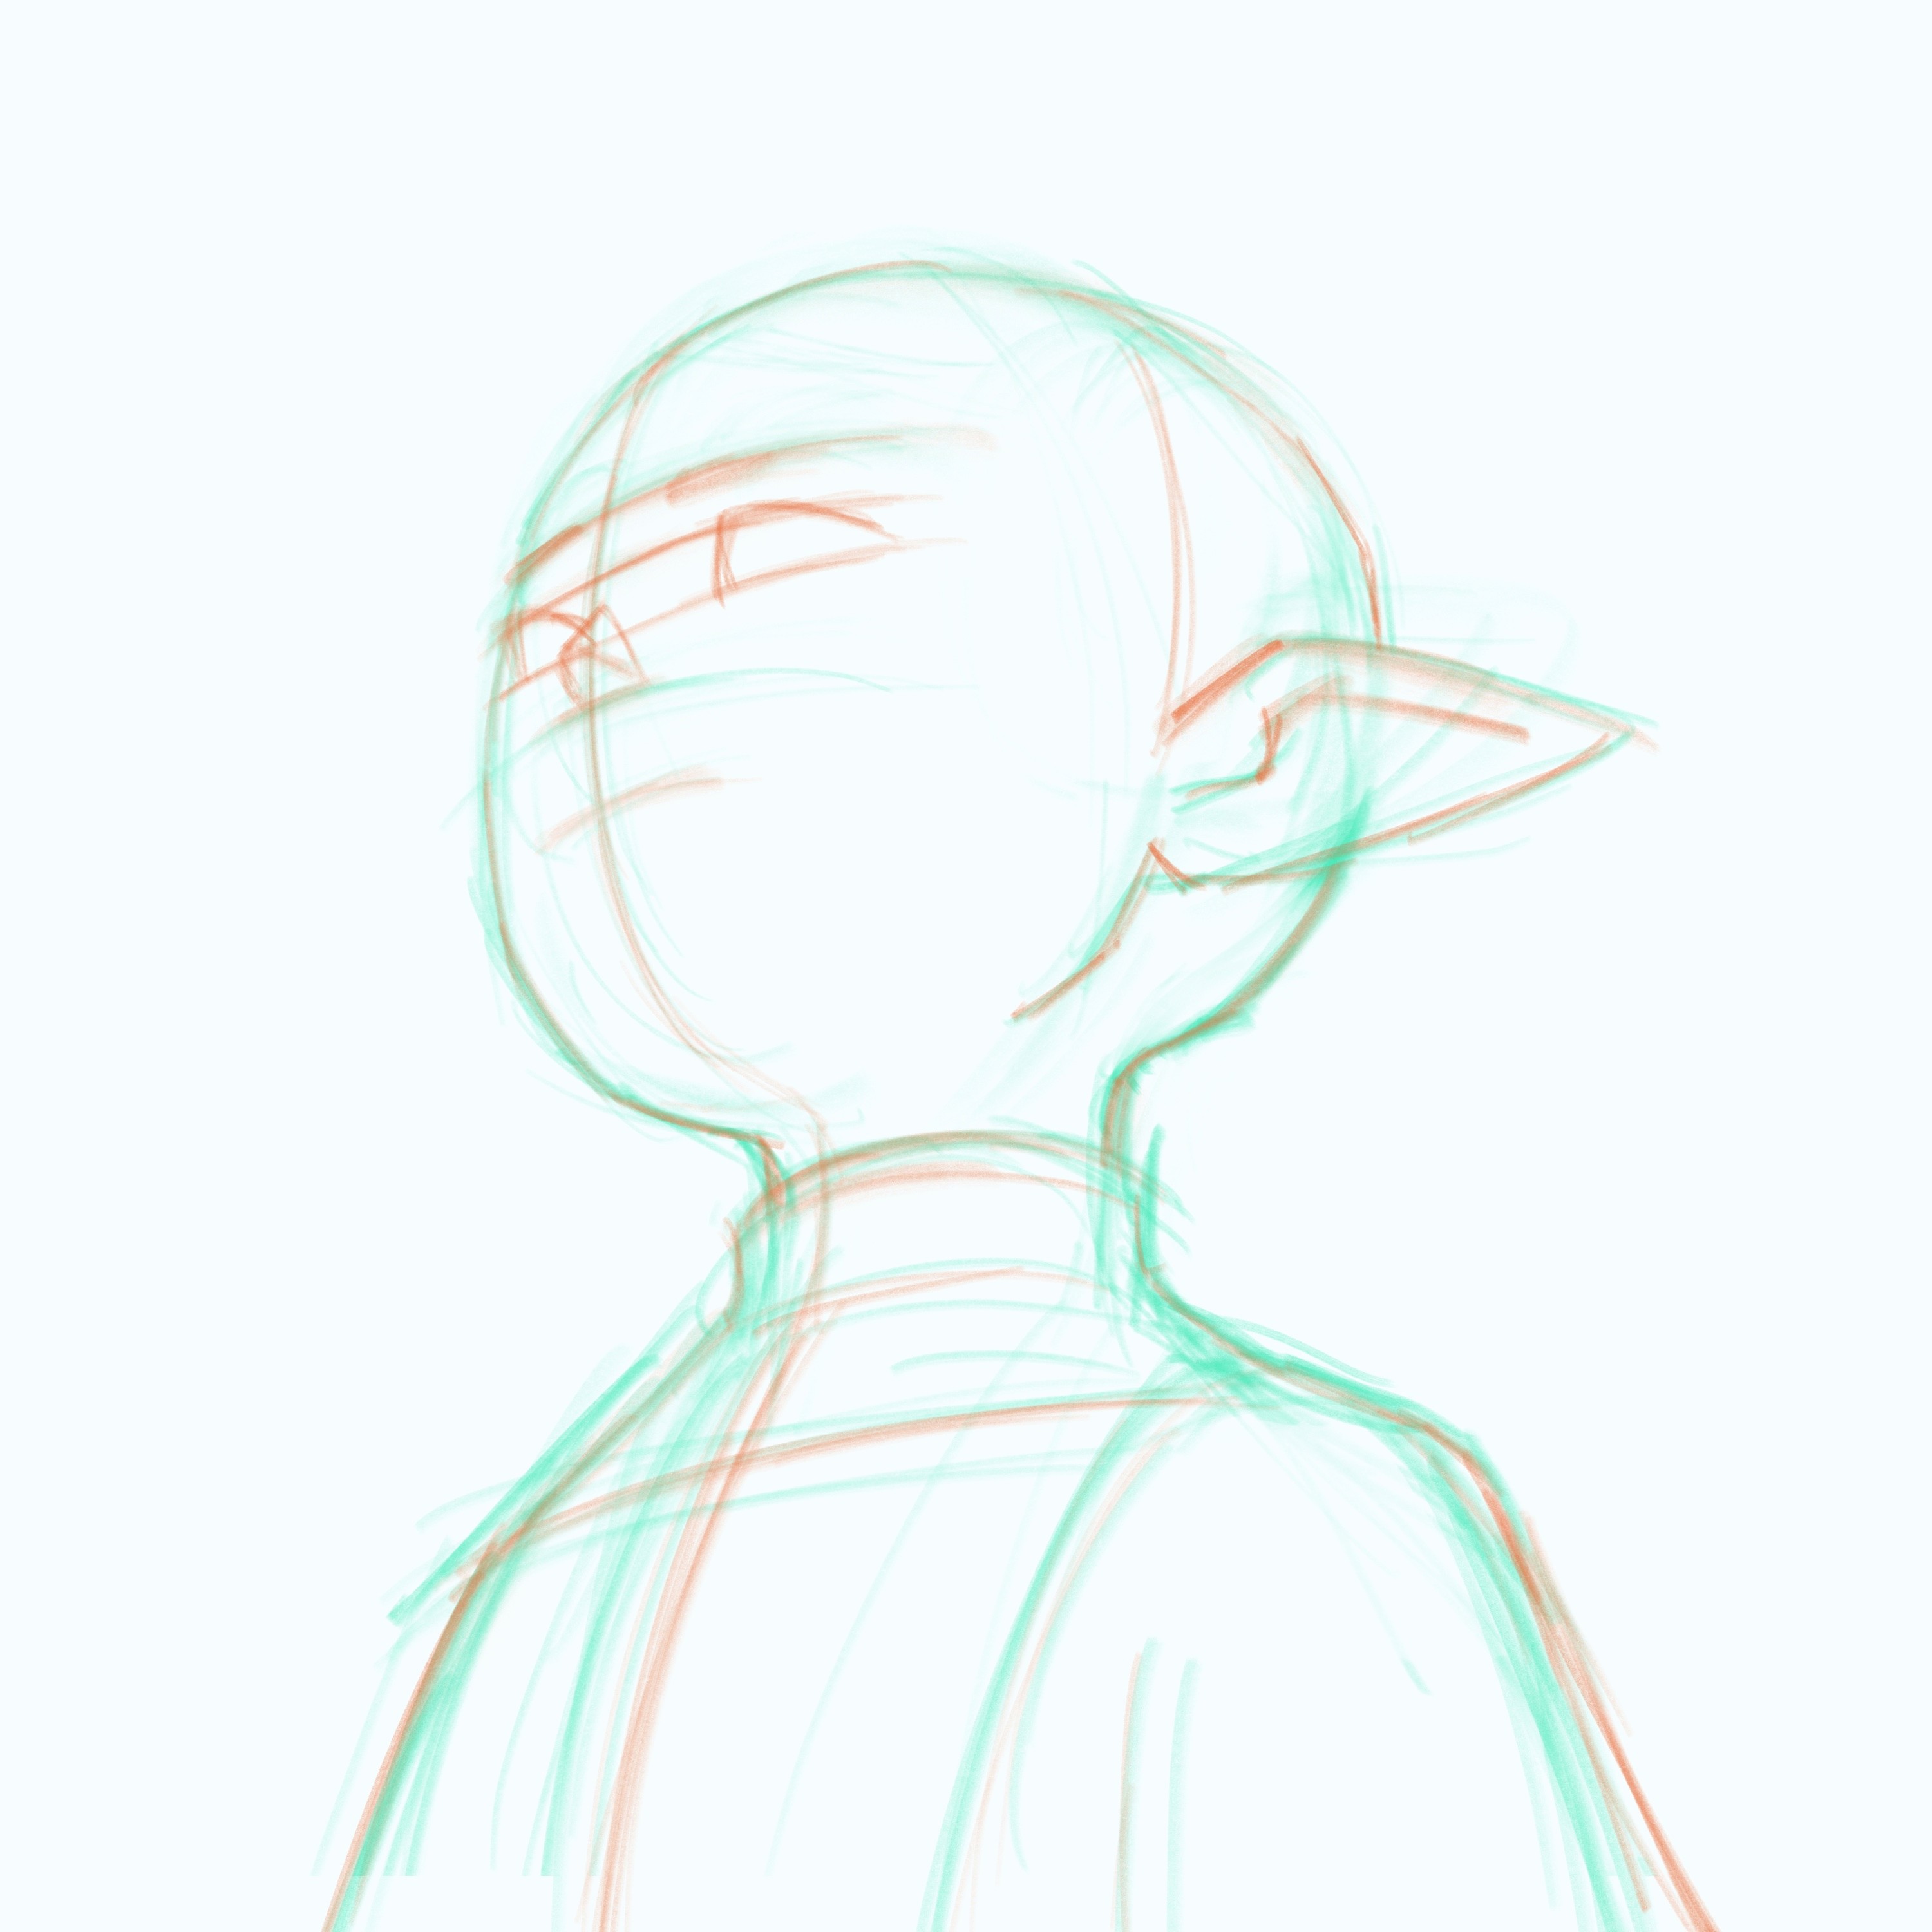
Now that I know where I want to place all of my features and I'm happy with the perspective read, I'm going to start adding in the features that will make Frieren look like Frieren! That would be the hair, shape of the eyes, shape of the eyebrows, and details like the earrings. I'm still very mindful of the perspective and make sure that everything I add is following the angles I established.
I would say the biggest tip I would have when drawing faces at odd angles is that a lot of times less is more. If you are communicating an accurate perspective and foreshortened head with the features and key elements of the face, it's often not necessary to add harsh jawlines or other creases in the face. Sometimes these additional lines can be too harsh and make the character feel older. I often have to convince myself to be okay with leaving out information and try to stop myself from overdrawing.
Adding Specificity
Once I start to see Frieren emerge from the construction lines, I'll just continue to add more information. This is where it starts getting fun and I can start honing in on some of the things that make Frieren distinct. I'll also start to make the construction lines more organic and keep adjusting each shape and line to make things more specific than the basic block-in. It's very easy to lose sight of the perspective here, so I always remind myself to zoom out, flip the canvas, and make sure things are still in line with my original blueprint.
Refining the Drawing
My sketch at this stage starts getting pretty messy as I'm searching for the right lines and shapes, so at a certain point, I'll try to get more specific. When I'm loosely sketching, my lines start getting really thick and messy, so I will use my eraser to shave down the lines and clean things up. I'll also start turning down the opacity of my construction drawing or start erasing unnecessary lines to get a cleaner look at the drawing.
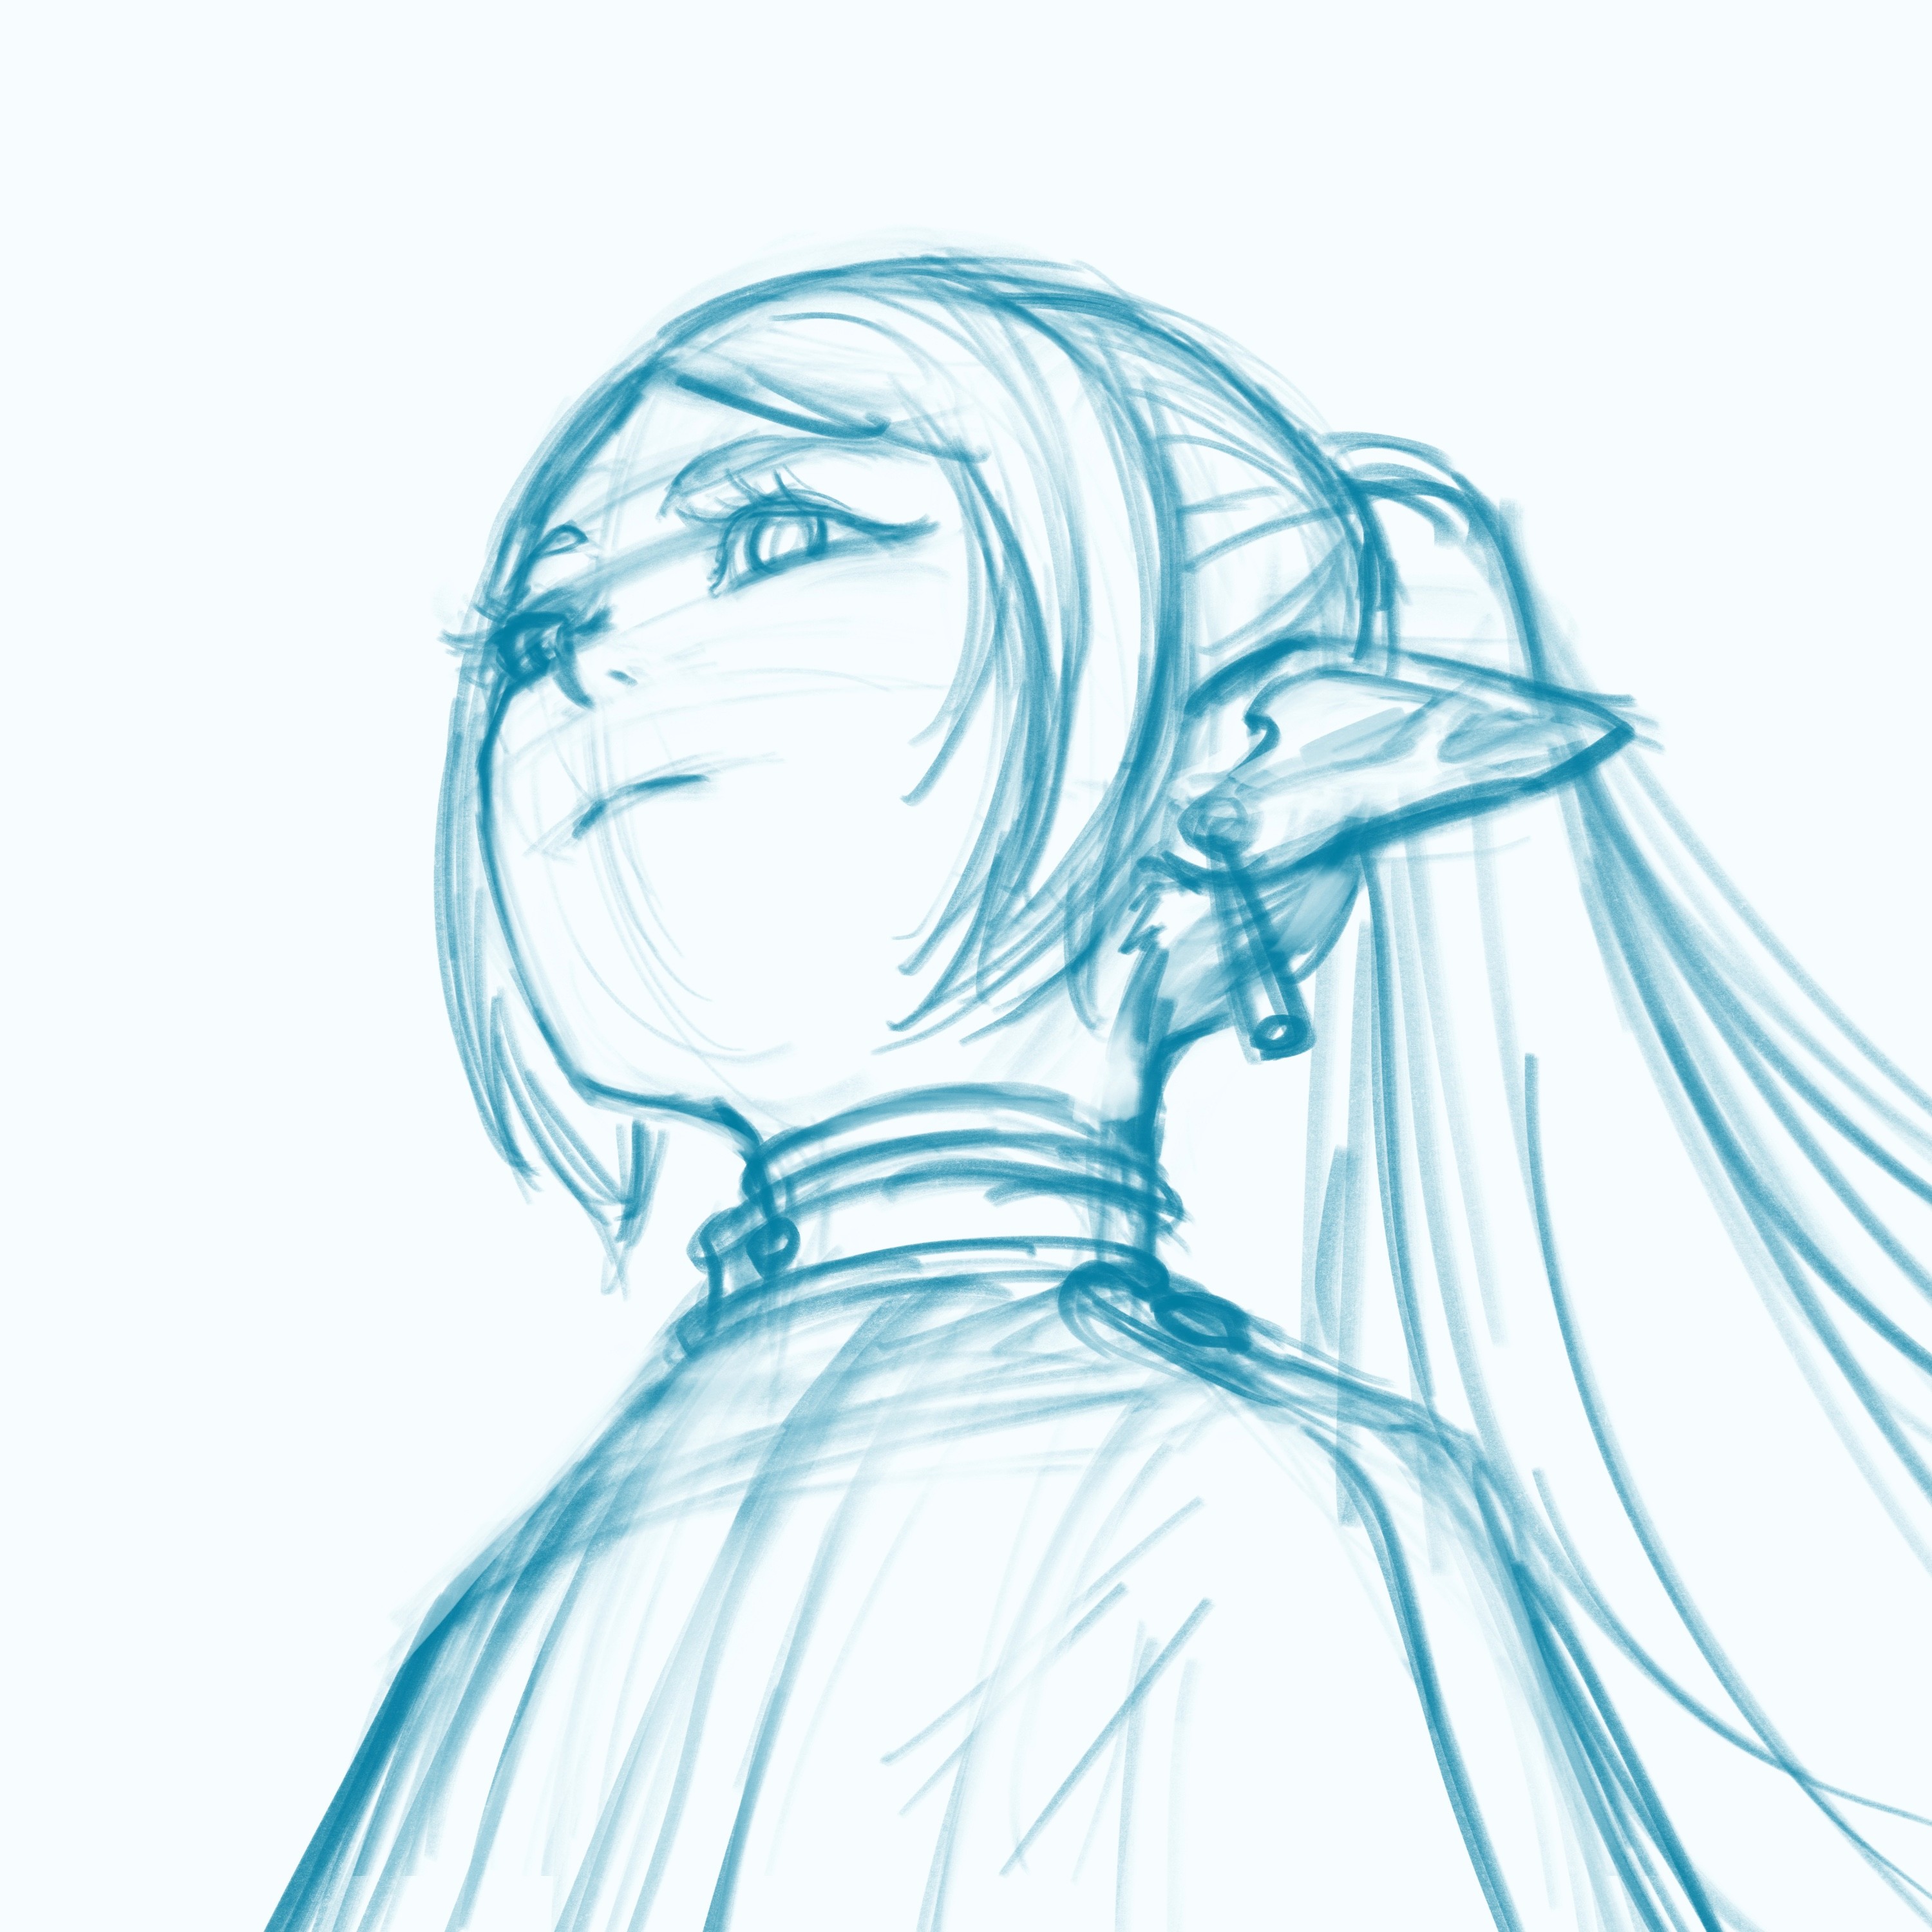
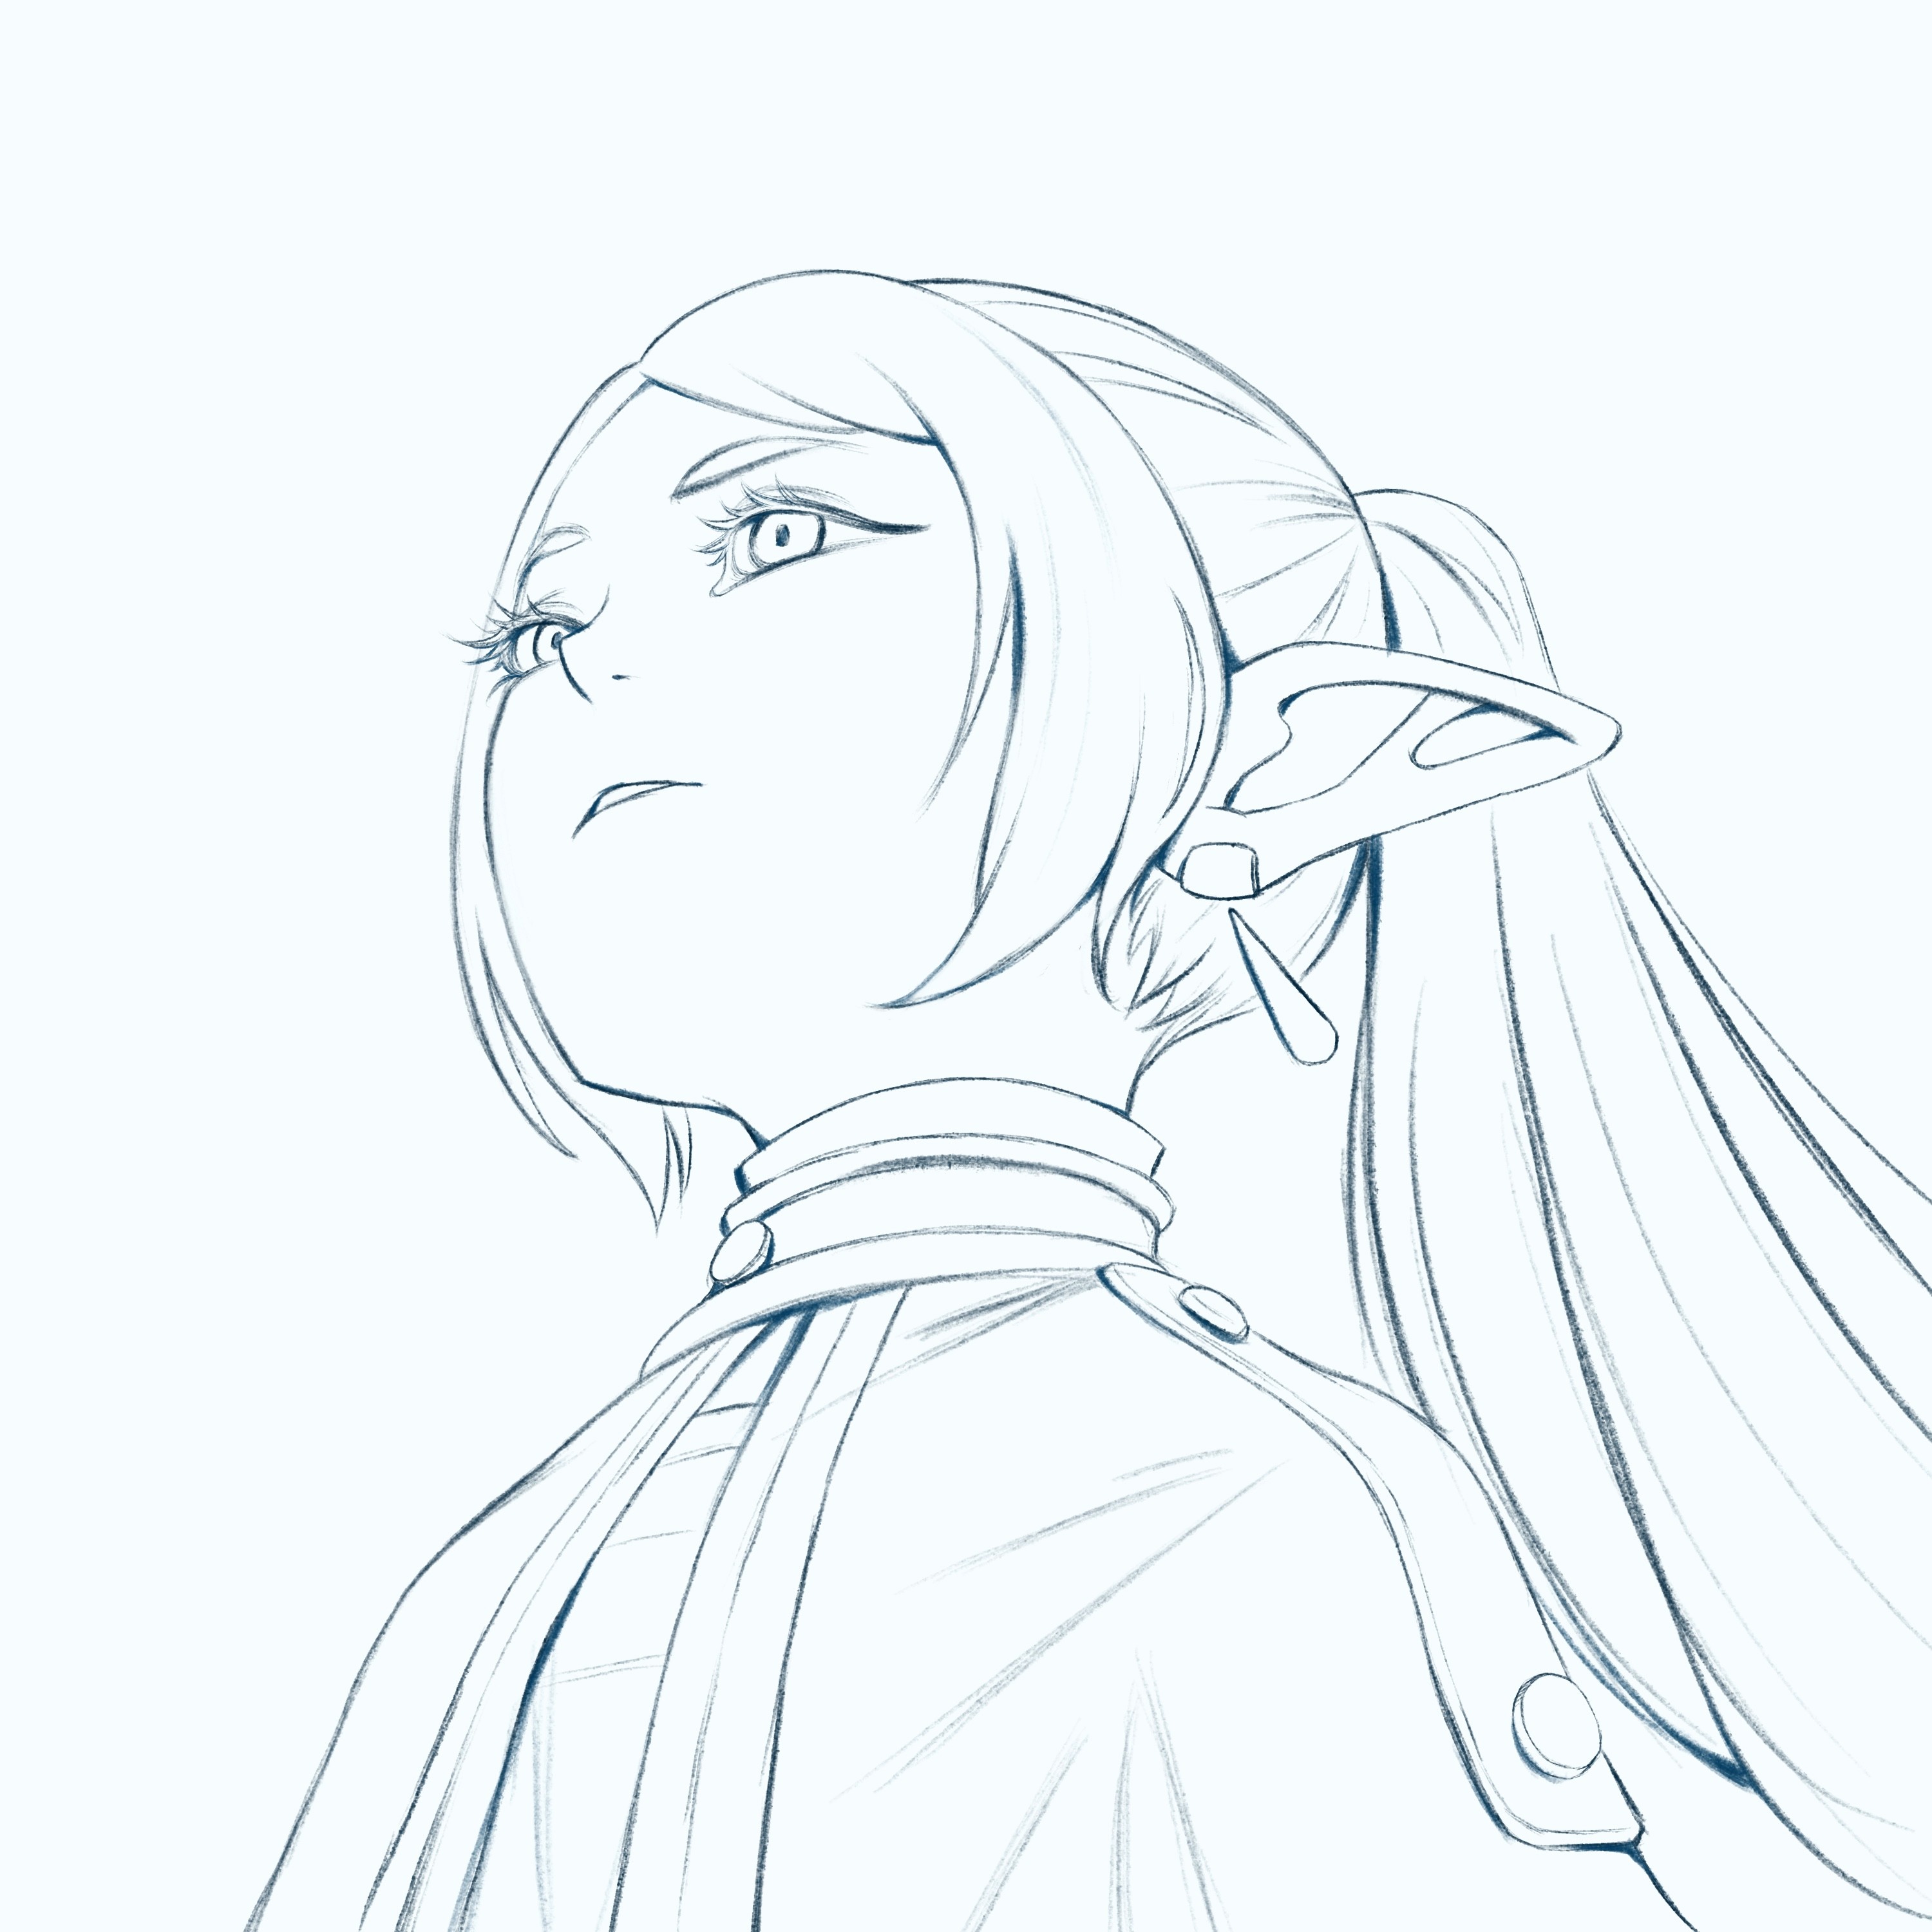
Carving Out Each Line
I'll spend a lot of time in this stage just refining the lines, shaving them down, and making each curve very intentional and specific. It's very easy to zoom in too much and lose the original integrity of the drawing, so I make sure to keep zooming out and flipping the canvas to check that I'm still on track. I'm also very mindful of trying to keep the energy and gesture of my initial sketch while refining because it's very easy to lose the gesture and start making things too stiff.
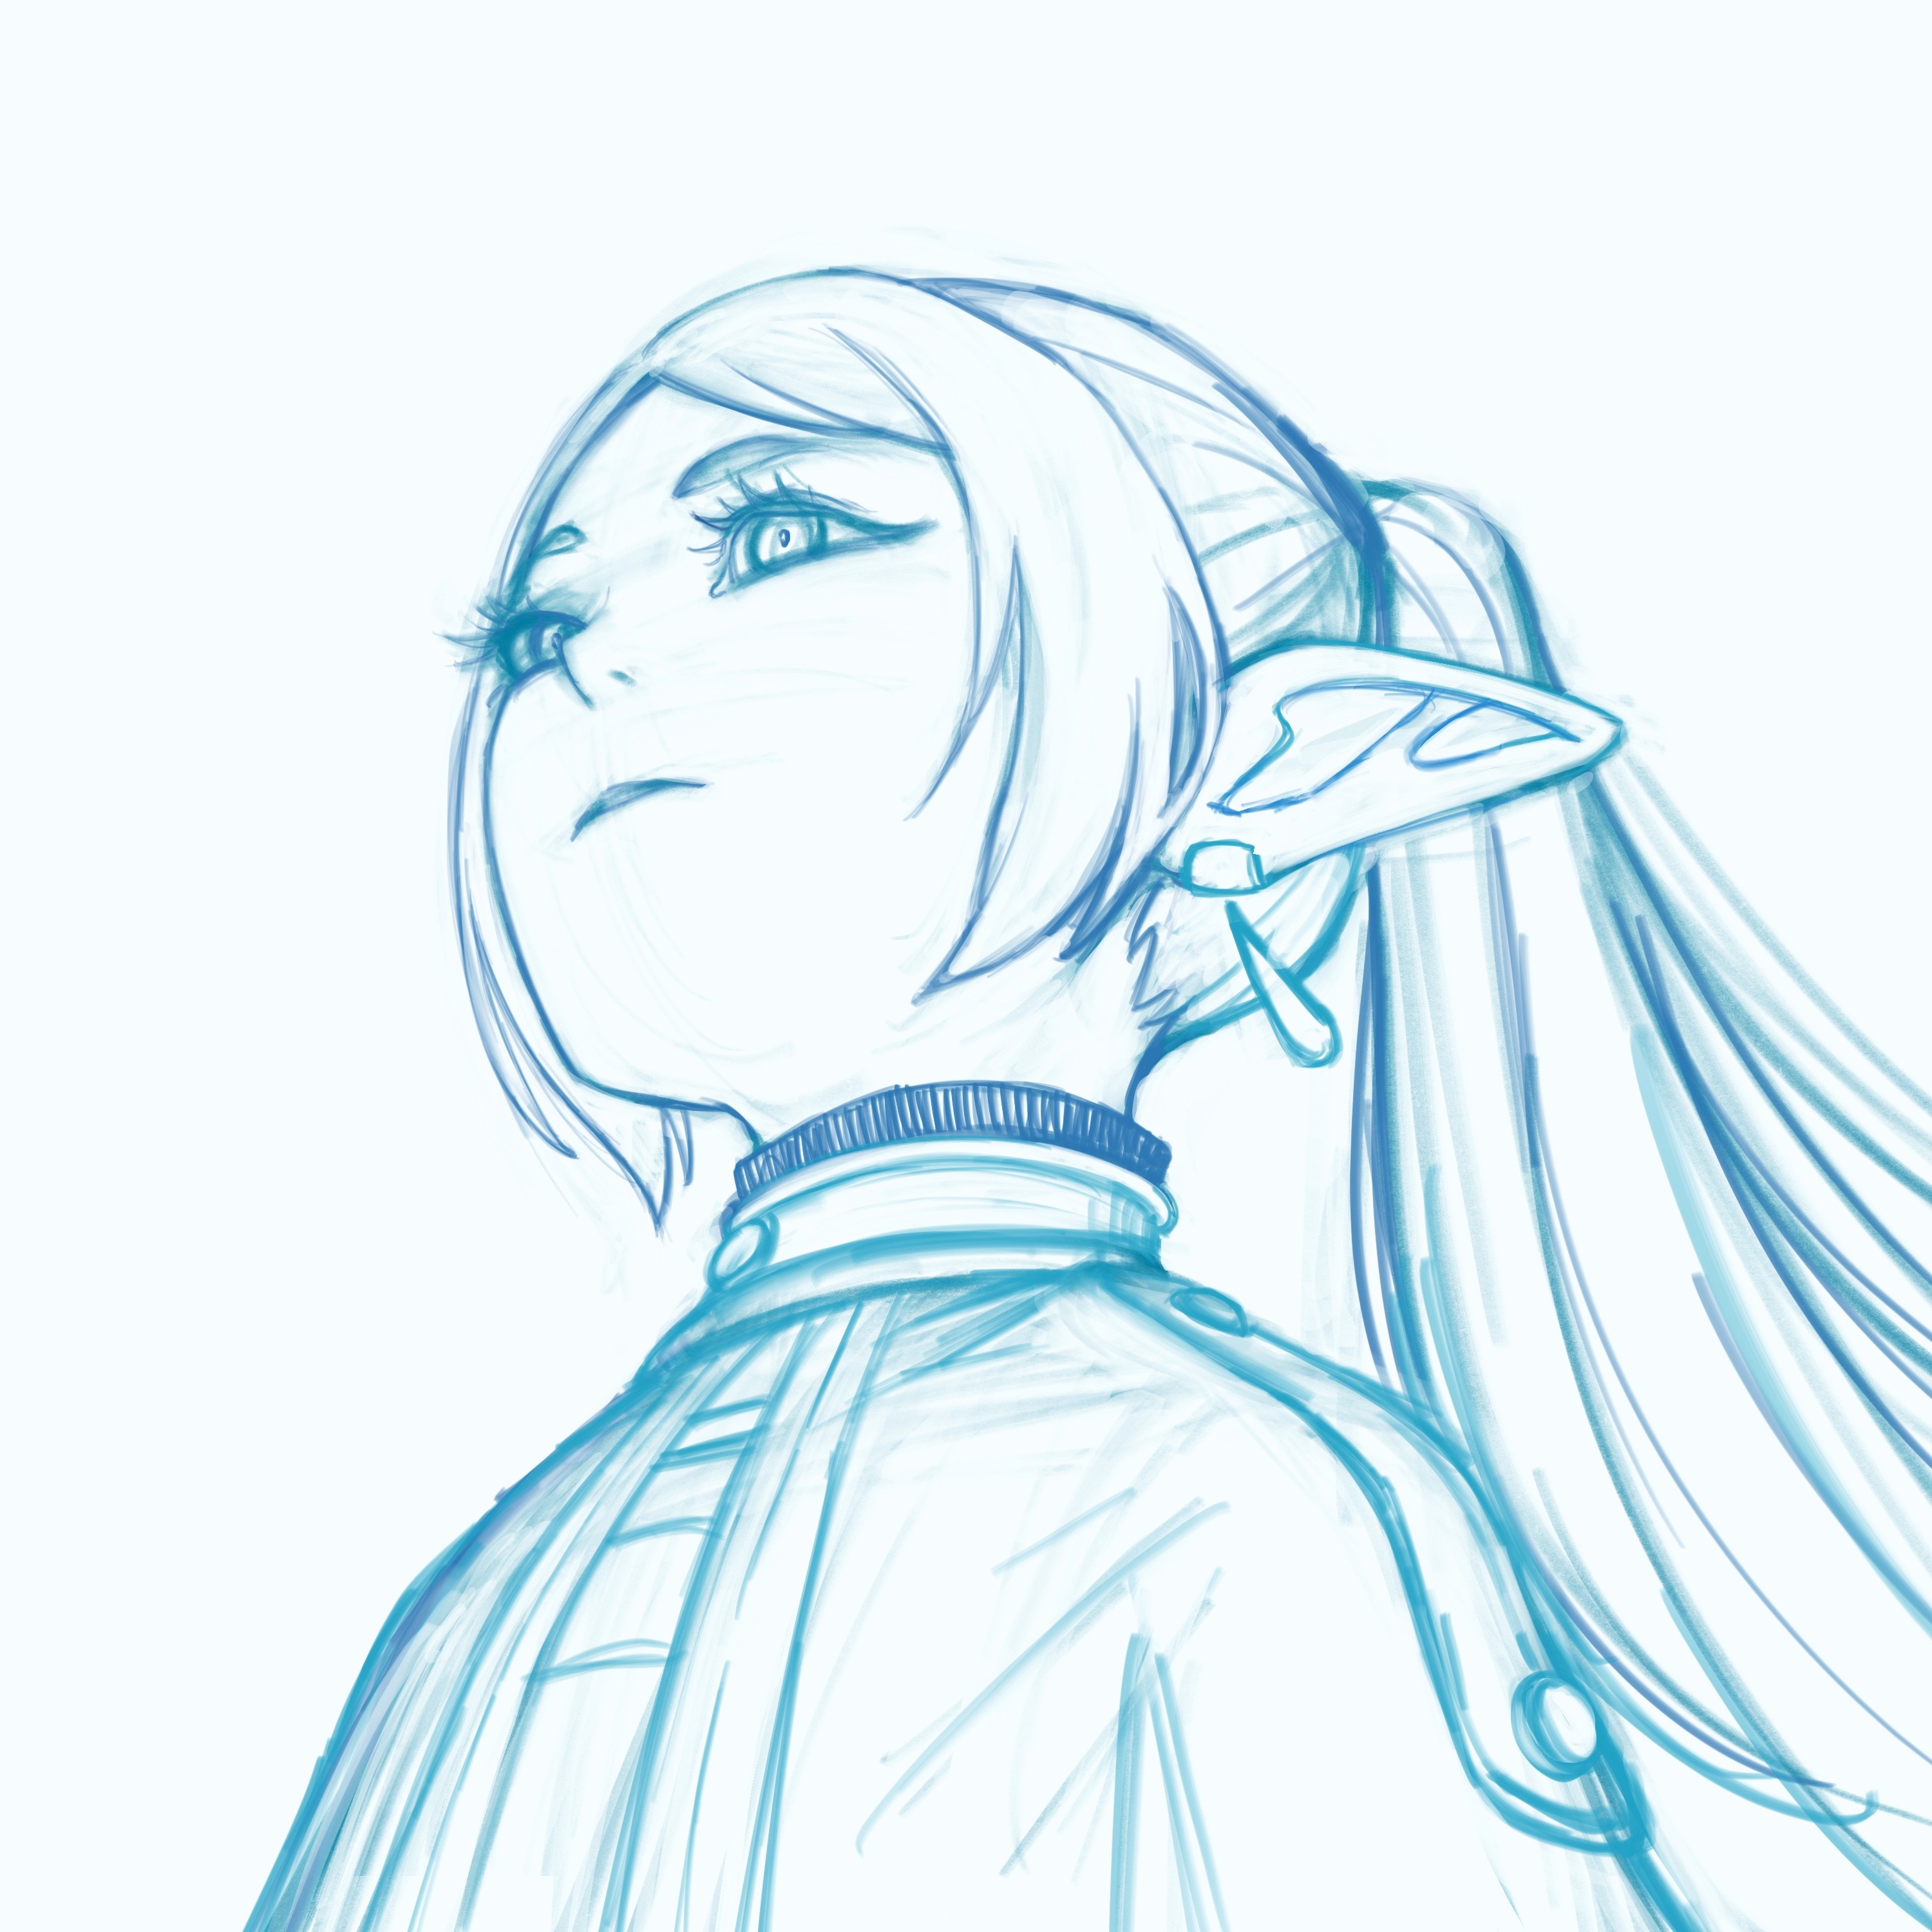
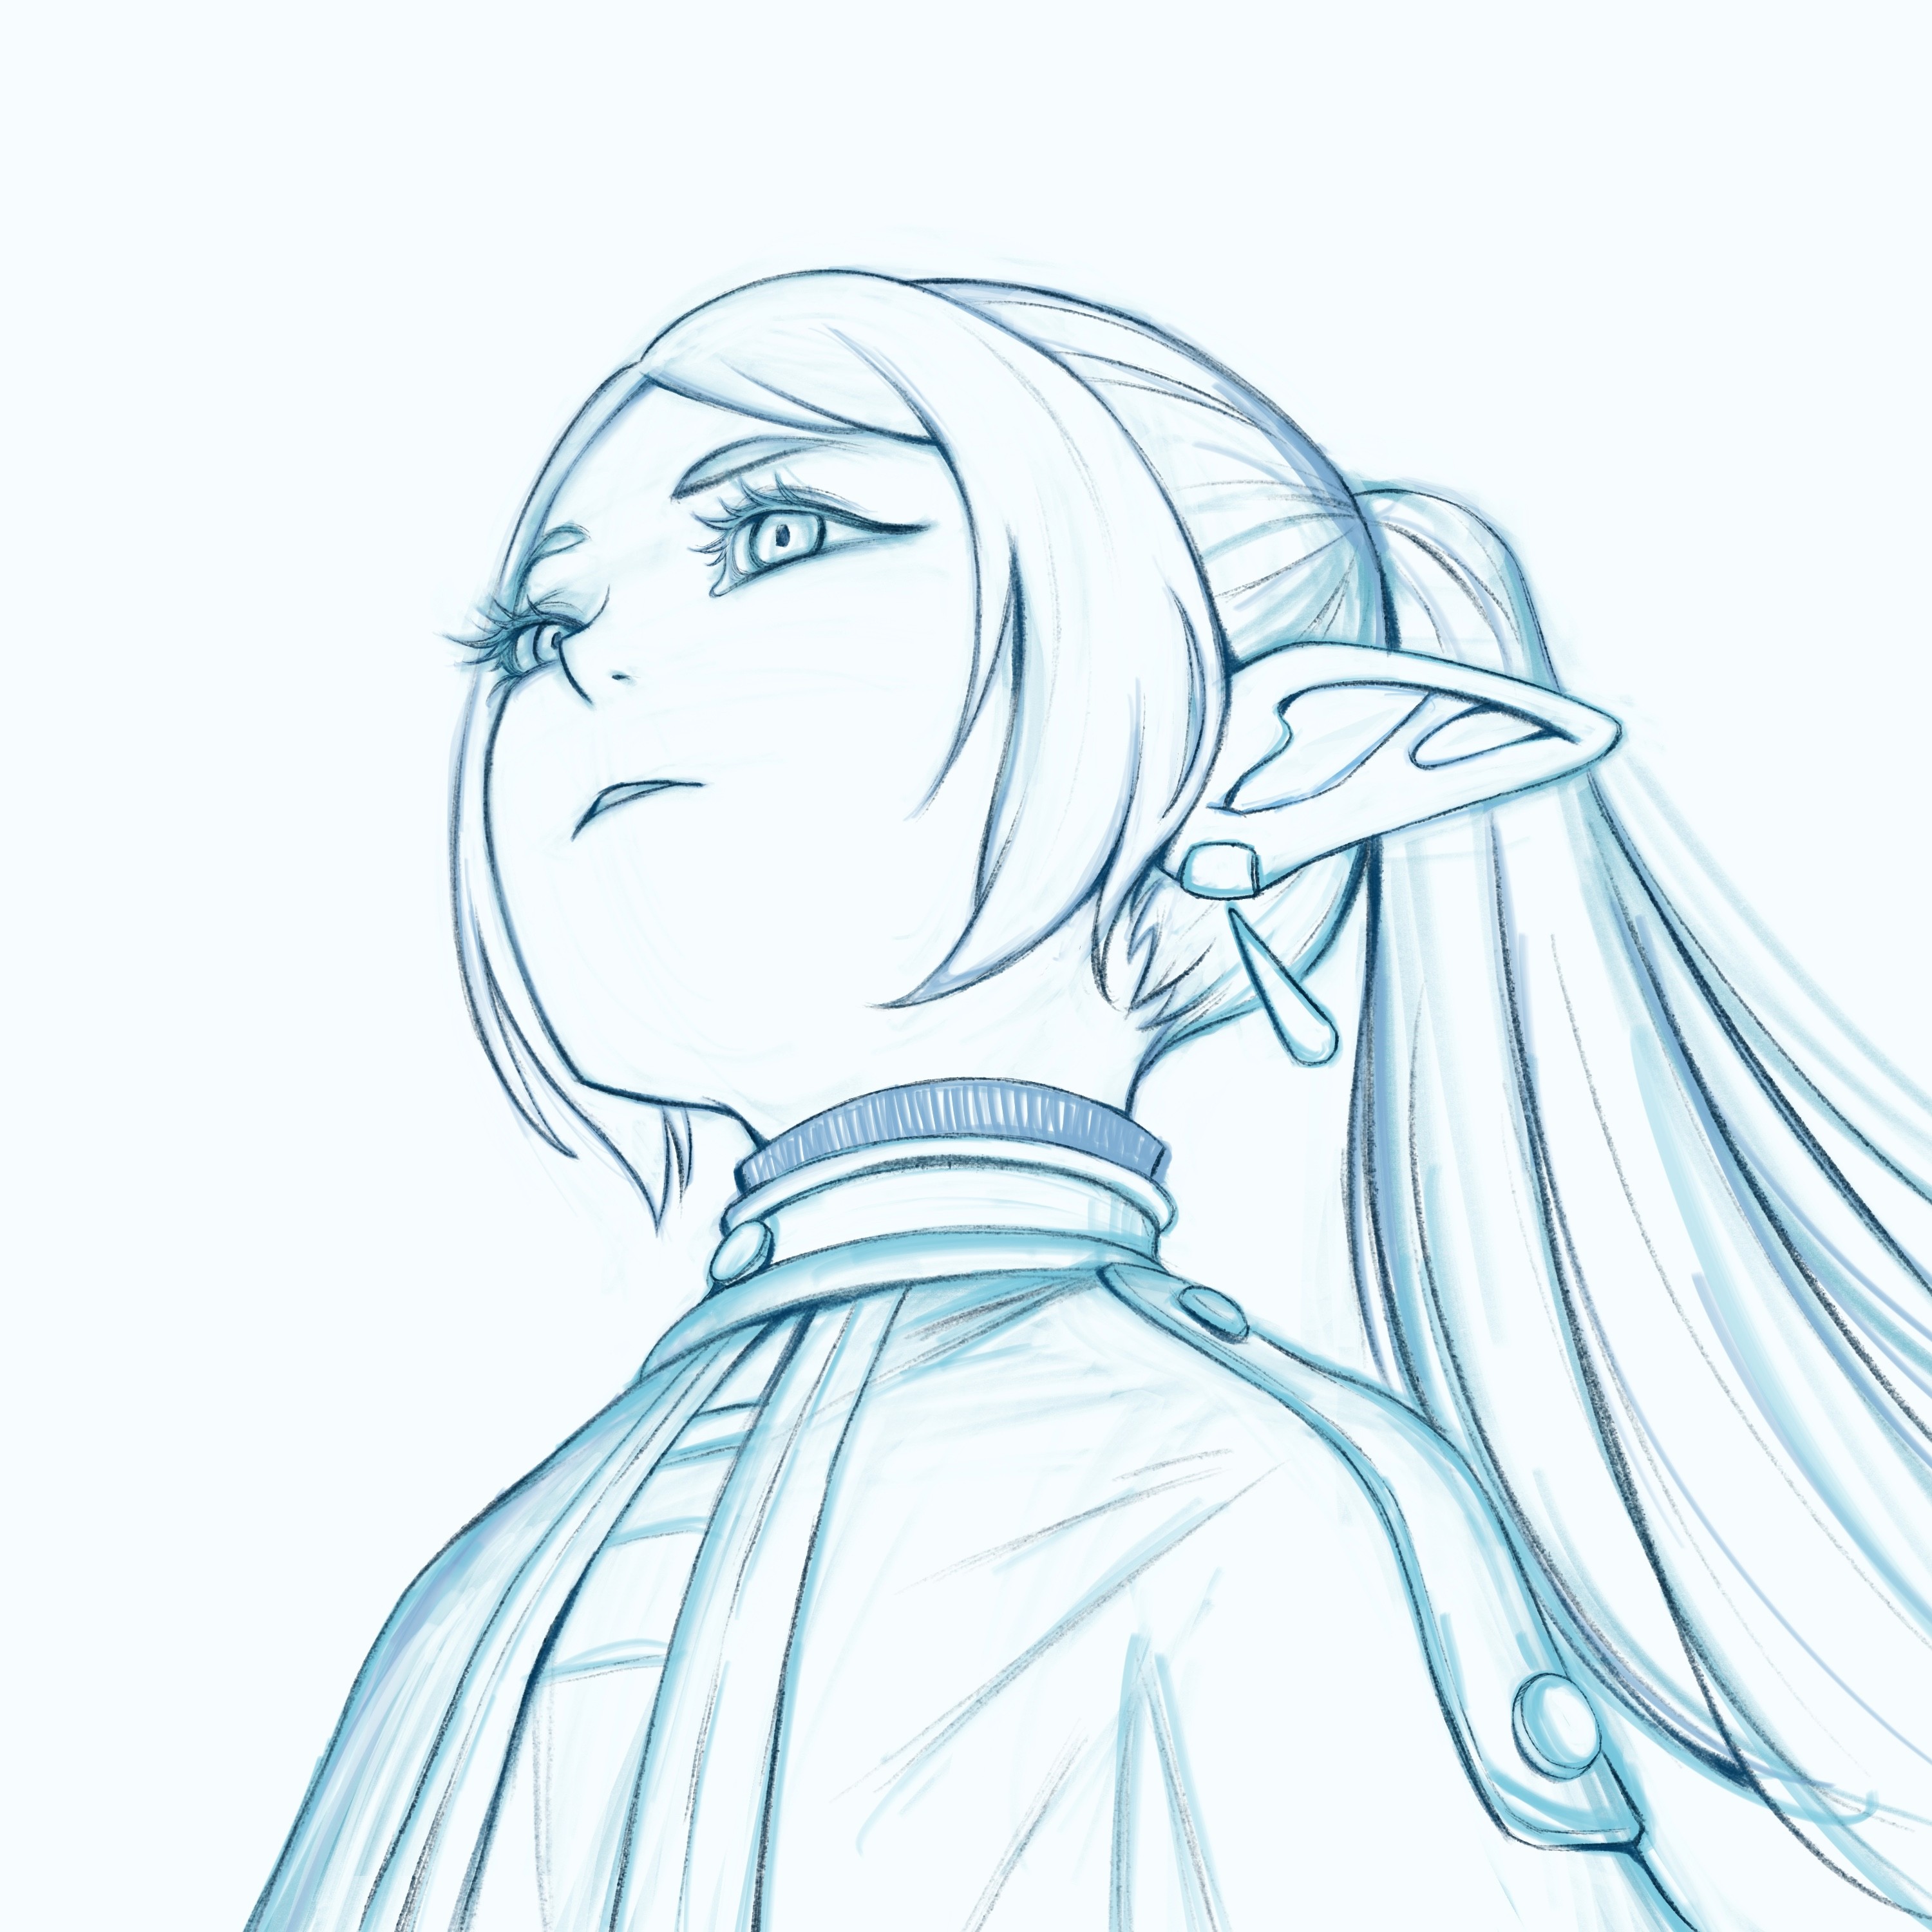
Final Linework
I really love the gestural sketchiness of drawings at this stage and I really want to keep some of this energy, but I wanted to do one more clean linework pass on top. So I used a much thinner brush and went over the sketch with a final clean linework pass. I will typically lower the opacity of the sketch layer to where I can barely see it, make a fresh new layer on top of the sketch, and then do the linework on the new layer. It's really helpful to get your lines as specific as possible in the previous step so that you know exactly where to place your final linework. The main thing I pay attention to when doing linework is line weight. I love the ethereal effects you can get just by using accents and rhythmic thin and thick lines.
Final Touches
I had a lot of fun with the clean linework pass, but I still kind of missed the energy in the sketch I had, so I put the final linework layer on top of the sketch layer to create this fun tracing paper effect. Do you like the piece with just the clean linework or with the sketch underneath more?
And that's my step-by-step of how I drew Frieren from a low angle! Idk about you guys, but I've been feeling pretty low about the state of the world, so it felt kind of awesome to witness and be a part of this trend. I felt like I was back in the early days of Tumblr or Instagram when communities of artists would do little art challenges together! Sending much love and thanks to SpaceDev1 on Reddit for launching this crazy phenomenon!
It was really inspiring to see so many different artists' methods and approaches to drawing her, so I feel like I learned a lot from this challenge too. Have you guys tried drawing Frieren from a low angle yet? I'm really enjoying seeing everyone's take on this so much! Hope you guys try it out!